Showing posts with label dessert. Show all posts

Sunday, January 7, 2018

Luscious Fresh Lemon Bars

When you get the chance to pick ripe lemons off a tree this is the recipe for you.  Really it can happen.  In Tuscon, Arizona at the KOA you can camp and pick a bag of lemons off the tree beside you.  Our friends met us for lunch the other day with a big bag of ripe fresh picked lemons.  Oooohhh, my mouth is puckering now.
I stole this recipe from a cookbook that I found in a lending library.  Cookbook is called "Gramdma's Favorites".   Yes this is one of my new favourites.   The lemon layer is like a custard, gooey and good.

Crust
1/2 cup very soft butter
1/2 cup granulated sugar
1 1/4 cup all purpose flour
grated lemon peel from 1 lemon
Lemon Layer
4 eggs
1 2/3 cups granulated sugar
3 tablespoons all purpose flour
1/2 teaspoon baking powder
grated peel of 1 lemon
juice of 1 to 2 fresh lemons - need at least 6 tablespoons
1 teaspoon vanilla
confectioners sugar to dust before serving

Make the crust in a baking tin 13 x 9 x 2.  I used a foil pan and it worked great.
To save washing a bowl I put the ingredients all together into the baking pan and worked it together with a fork.  When evenly mixed I used a spatula to pat it down.
Bake this crust at 350F for 15 minutes.

In meantime make the lemon layer mix.  Large bowl.  Whisk the 4 eggs together till mixed, I did it with a hand whisk.  In a 2nd bowl add the flour, sugar, baking powder and blend with a fork.  Then slowly add this dry mixture to the eggs.  Beating with the hand whisk.  Next add the lemon peel, vanilla and whisk.  Last add is the lemon juice, but slowly while beating with the whisk, not all at once.
Then pour this wet mixture over the crust.  Put the pan back in the oven at 350F for 25 minutes.  After baked let it cool and cut into squares with a wet bladed knife.  Dust with icing sugar when serving.

Wednesday, October 2, 2013

Carrot Cake with Cream Cheese Icing

Thanks to Canadian Living Magazine for this recipe.  When Mom harvested her carrots this fall we reviewed all our cake recipes (about 10 of them) and found this one to be so good.  We discarded the rest of the recipes - why mess with it when its perfect?  We make 2 small to medium size cakes with this recipe.  One to eat now and one for the freezer.  Ice before you use it.

Cake Ingredients
2 cups all purpose flour
2 tsp baking powder
2 tsp cinnamon
1 tsp baking soda
3/4 tsp salt
1/2 tsp nutmeg
3/4 cup gran. white sugar
3/4 cup packed brown sugar
3 eggs
3/4 cup vegetable oil
1 tsp vanilla
2 cups fresh grated carrots
1 cup drained crushed canned pineapple
1/2 cup to 1 cup raisins - or nuts or both if you prefer..... matter of personal taste(I use 1 cup raisins but my Mom uses 1/2 and 1/2)
Icing Ingredients
Soften - 1 pkg 250ml Philadelphia Cream Cheese not the low cal or generic name - This is critical in the taste of the dessert (I use low cal and generic and can tell the difference when we use the real thing) :)
1/4 cup softened butter
1/2 tsp vanilla
1 cup icing sugar

Grease and flour 1 13"x9" pan or 2 small 9" x 9" pans.  Set aside.  Preheat oven to 350f.
In large bowl whisk together the dry ingredients - flour, baking powder, soda, salt, cinnamon, nutmeg.  In a separate bowl beat the eggs till frothy and add the brown and white sugars and beat again.  Add the oil and vanilla and beat further till mixed.  Pour the wet over the dry ingredients.  Stir till moistened.  Add the drained pineapple, carrots, raisins.  Stir till mixed.  Pour into the pans, split roughly in half for the 2 pans.
Bake in center of oven at 350F for 40 minutes.   A toothpick needs to come out clean.
Let cool in pan on a rack on the counter.  When cool you can ice the cake.
For the icing put all ingredients into a bowl and with mixer beat till smooth.  Spread on cake.

Keep in refrigerator if you have any left...... this cake never makes it past the counter in one day!!!


Monday, July 29, 2013

Cherry cheesecake Danish

These are better than the Danish you buy!!! And a bit if a cheater too.

In a square pan lay parchment paper on the bottom. 
Pop open a roll of Pillsbury crescent and divide in half - squeeze the seam together, lay in bottom of pan.  U will use the other half on top. 
In bowl beat 1 small tub of Philadelphia cream cheese+ 3/4 cup icing sugar + 1 egg white.  Blend and spread on dough in pan.  Use half a can of cherry pie filling spread on cream.  Top with other half of pastry. Bake at 350 fir 30 minutes. 
Let cool and drizzle top with icing - 1/2 cup icing sugar mixed with dash of vanilla and milk till consistency is just right. 
You can use pie filling in apple, blueberry or any other fruit of choice.  Now get that  pot of coffee going:)

Sunday, October 28, 2012

Apple Dumplings

I use homemade pastry dough when I make these but you can buy the pie dough as well in the grocery store.  These are like an apple pie only individualized.  We top it with caramel sauce or ice cream or whip cream or "all" of the above depending how decadent we feel!  Great when you bring home those fresh fall apples.
To make 4 servings I use only 1 large apple.
Roll out enough pastry dough for 1 large pie.
a

Cut into 4 sections with a knife.
In a bowl add 1 cup brown sugar, 1 tablespoon cinnamon, 1/4 cup of raisins and 1 large apple, cored and skinned and cut into small pieces.  Mix together and spoon onto the 4 sections of pie dough.
Fold pastry dough over the apple mixture.

Brush with milk or egg white.  Sprinkle with granulated sugar or brown sugar.  Bake in oven at 400F for 25 to 30 minutes.  Serve individual while warm.


Wednesday, November 23, 2011

Cherry Cheesecake Delight

This is such a great holiday dessert, often we have it at Christmas or Thanksgiving or Easter when we get together as a family.   Tomorrow we are taking it to the US Thanksgiving Dinner at the RV park we are camped in.  They are bringing the Turkey, Stuffing and Gravy and all the other campers are bringing potluck.  I know there will not be much left of this although Billy is hoping so as he wants to bring it home after!

Base:
2 cups graham cracker crumbs
1/2 cup melted butter
1/4 cup sugar
Mix together in bowl with fork and pat into the bottom and sides of a 13 x 9 inch pan, or this one is about 11 x11 corning ware.  Refrigerate for 10 minutes.
Creamy Filling:
1 envelope of dream whip made as directions on package (1/2 cup milk + 1 tsp vanilla)  I make this and keep it in the fridge while I continue with the rest of the filling.
1 large Philadelphia cream cheese
1 cup icing sugar
Mix cream cheese and icing sugar in bowl with mixer till creamy and smooth.  Then add the dream whip to the mixer and and cream together.
Assemble:
Remove the crust from the fridge, pour the creamy cheese filling on top, smooth with spatula.
Cover with two large cans of cherry pie filling.
Refrigerate for at least 4 hours or overnight.
Cut and serve cold.
Delicious!

Saturday, October 1, 2011

Nanaimo Bars

Just have to have these for christmas baking, my husband loves them.  How do you say that name???? Nuh-NIGH-moe.  Yes it is named after a little town on Vancouver Island, and the recipe is traced to the church ladies of the town. 


This makes a 9 x 13 pan, cut in half for 9 x 9 pan 
Parchment paper
2 eggs, lightly beaten
1 1/3 cups melted butter + 2 tbsp unmelted butter
2/3 cup cocoa
1/2 cup gran sugar
3 cups graham cracker crumbs
2 cups shredded coconut
1 cup finely chopped walnuts
1/4 cup milk
2 teaspoons vanilla
4 cups confectioners sugar (icing sugar)
8 ounces semisweet chocolate, chopped
Heat oven to 350F. Grease 13 x 9 pan.  Line with parchment paper.
Whisk together eggs, 1 cup of the melted butter, cocoa, and sugar in large bowl.  Stir in crumbs, coconut and walnuts.   Press into prepared pan.  Bake 10 minutes, cool in pan on rack.
Stir together remaining 1/3 cup of melted butter, milk and vanilla in medium bowl, beat in icing sugar with mixer.  Spread evenly over cooled base.   Refrigerate until firm, about 45 minutes.
Place chocolate in a microwave bowl with remaining 2 tbsp butter.  Heat 1 minute, stir.  Heat 30 seconds, stir.  Again if necessary, till chocolate is smooth and spreadable.  Pour over bars, smooth out.   Refrigerate till set about 1 hours.   Use the parchment paper to lift out of pan.  Cut into bars. 

Peanut Butter Squares

These taste so much like Reese's Peanut Butter Cups!  And you don't really need anything other than a microwave to make these.
Recipe is for 9 x 13 or you can cut it in half to make a 9 x 9 pan.
Base:
1 1/2 cups graham crumbs
1 3/4 cups icing sugar
1 cup smooth peanut butter
1/2 cup soft butter
Topping:
2 cups milk chocolate chips
1 cup smooth peanut butter


No need to grease the pan.  Mix graham crumbs, icing sugar, 1 cup peanut butter and butter all together.  Press into pan.
In a microwave bowl melt the chips and peanut butter and mix together.   Start with 1 minute at a time and stir in between then heat again as needed.  Pour choco/peanut topping over the pan and smooth out. 
Chill in refrigerator for a couple of hours before cutting - 1 inch squares are perfect for popping in your mouth.  I cut them all up and remove from pan to a tupperware dish with lid.  Keep in fridge.
 

Monday, May 9, 2011

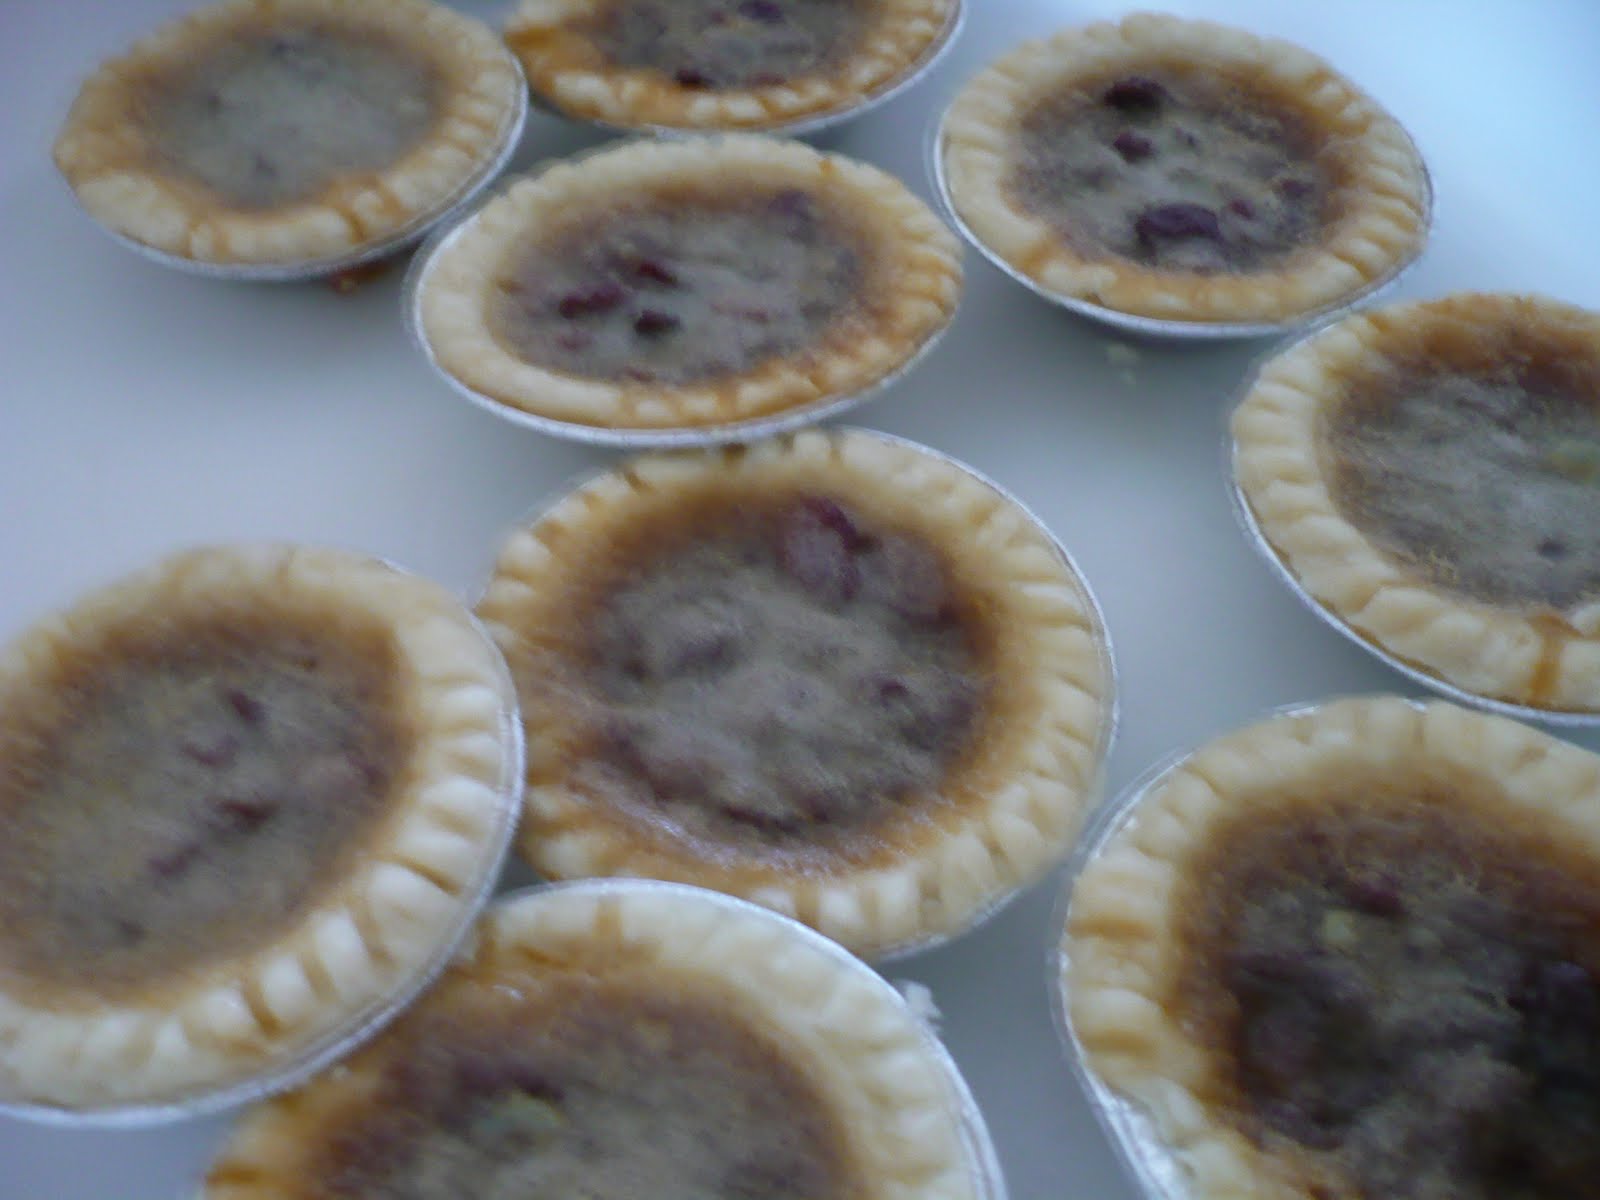
Butter Tarts

Once you have pastry dough made you can whip up some of these tarts or just buy the frozen pastry tarts.   No one will notice that your pastry is not homemade since the filling overwhelms you!  Yes they are sweet and buttery and gooey!!!  When the kids are home these will never last throughout the day. 
Preheat oven at 350F.  Put tart tins on a baking sheet.
Soak 1 cup of raisins in warm to hot water.  
Drain and dry off on paper towels.  
In medium size bowl mix 2 eggs, 1 tsp vanilla, 1 cup of brown sugar and 1/2 cup corn syrup.  Just mix with a fork by hand. 
Add 1 tbsp white vinegar and 1/2 cup of melted butter, then add raisins.  

My bowl has a pouring spout so you can pour and stop in each tart with a spoon.  Do not fill to top as they will spill over.
Bake 15 to 20 minutes.
Remove and cool.   You may need to use a spoon to eat these individually.


These mixing bowls are from Tupperware and they have a handle, lid with pouring spout and the sides double as huge measuring bowls.  It looks like they are quite different now very fancy.
I have two of these since so many recipes need two bowls 1 for the mixing of the dry ingredients and 1 for the mixing of the wet then you add them.  So these are great for that.

Tuesday, April 26, 2011

Brownies

There are several versions of low cal, low fat brownies but this is not one of them.   These are definitely high test and worth it.  Enjoy!  They are very moist and dense.  Make a decadent dessert when cut in 3" square topped with vanilla ice cream and chocolate fudge sauce on top.... if you are going crazy might as well go all the way!  This is actually a very easy recipe to make for those who have few kitchen gadgets/appliances - since you only need a fork and a saucepan and a baking dish which could double as your lasagna pan.

4 oz of Baker's unsweetened chocolate squares
2/3 cup of Crisco shortening
2 cups white sugar
4 eggs
1 tsp vanilla
1 1/4 cup all purpose flour
1 tsp baking powder
1 tsp salt
1 cup chopped nuts - optional
Preheat oven to 350F.
In medium saucepan melt the shortening with the squares.  Tip:Remember that each individually wrapped square is one ounce.
Remove saucepan from stove and set on heat proof pad/block.
In the saucepan add in eggs, sugar, vanilla and mix by hand with fork or whisk.
In bowl whisk together the flour, baking powder and salt. 
Add this to the saucepan and mix thoroughly.  
Grease or spray with Pam a 13"x9"x2" pan.  I prefer a glass pan.
Pour brownie mixture into pan and smooth out.  Bake at 350F for 35 minutes.   Remove and cool.   Let sit at least 1 hour before serving.  Cut into squares. 

Friday, March 18, 2011

Baked Rice Pudding

I keep forgetting how simple this dessert is;  but so good.  I use to have to make this when my oldest came home from Uni  - if I made it in the morning by night is was gone!   You can serve it warm or cold and for added luxury I put a spoon of brown sugar on top.
There are a few different ways to make rice pudding; but i prefer the baked.  It takes longer but is worth the wait.  This is from an 1974 printing of a Betty Crocker cookbook,  so it qualifies as one of my "old" cookbooks.  Betty still knows what she is doing.
Just out of the Oven

Preheat your oven to 350F.  Use a bake proof casserole dish (Pyrex works good) no greasing necessary.  Find a large circumference baking pan that the casserole dish can sit in  when baking.  In this baking pan you will add 1 inch of hot water.  I boil my tea kettle and pour the water in the outside baking pan to the right height.


Step 1:
In small saucepan that you have a lid for - 1/2 cup any uncooked rice + 1 cup water.  Do not substitute instant rice, that is another recipe.  Boil and then turn heat down to low and put on the lid.  Cook and stir for about 12 minutes.   Water will be evaporated and rice swollen.  Remove from burner.


Step 2:
Need 2 medium sized mixing bowls.
In the first bowl  add 1/2 cup sugar + 1 tbsp cornstarch + a dash of salt
In the second bowl add 2 egg yolks (separate the whites and keep in freezer for use in another recipe).  With hand mixer whip the egg yolks till frothy just a minute or two.  Add 2 1/2 cups of milk and beat for minute.
Now add bowl 1 to bowl 2 and beat till mixed.
By hand add the rice + 1 tbsp lemon juice + 1/2 cup raisins.


Step 3:
Pour mixture into a large baking casserole dish.  Set into water pan in oven.  Bake at 350F for 1 1/2 hours.   About 3 times you will want to give the dish a stirring.  By the end it will be very creamy.   Remove from oven and let dish rest on raised holder.   Sprinkle top of dish with cinnamon.


Step 4:
Eat and be happy.  :)